How To Make A Lego Birthday Cake
Planning Your Lego Birthday Cake – From Bricks to Bites
Looking to build the perfect Lego-themed birthday cake? Well, my block-loving amigos, look no further! Planning your Lego birthday cake is a piece of cake…pun intended. First things first, gather your bricks, or should I say ingredients. Whip up a batch of colorful cake batter, stack those layers high, and watch your masterpiece come to life. But hold your horses, don’t forget the essential step: icing! Just like fitting that one stubborn Lego piece into place, spread a silky smooth layer of buttercream on your cake, making sure no bumps or gaps are left behind. And the pièce de résistance? The Lego bricks, of course! Molded out of fondant or carefully arranged from actual Lego bricks (hey, we aim for authenticity here), these tiny blocks will turn your cake into a Lego lover’s dream. So, dear Lego enthusiasts, don’t just build those Lego sets, build the sweetest Lego birthday cake that’ll make everyone want a bite!
Building the Foundation – Baking and Assembling the Lego Cake Layers
An interesting fact about how to make a Lego birthday cake is that many professional bakers and cake decorators use a technique called ‘brick impression’ to achieve the appearance of Lego bricks. This involves using a Lego base plate as a stamp on the rolled fondant or icing, creating an intricate texture that perfectly mimics the iconic Lego brick design. It’s a fun and inventive way to add authenticity to a Lego-themed cake!
Alright, folks, it’s time to put on our construction hats and get building! Today, we are not tackling a skyscraper or a bridge, but something even more delicious and delightful – a Lego cake! Just like any good project, we need a solid foundation. So, let’s dive in and start baking those cake layers. Whip up your favorite batter, whether it’s chocolate, vanilla, or a rainbow explosion, and get those beauties out of the oven. Now comes the fun part – assembling the layers. Think of yourself as the Lego master builder, carefully stacking each piece with precision. Don’t be shy with the frosting, my friends. Use it as a tasty adhesive to stick those layers together, building a delicious tower of sugary goodness. And remember, if a few Lego pieces find their way into your mouth during the process, think of it as quality control! Happy building, my fellow cake architects!
Mastering Lego-Like Decorations – Techniques for Creating Lego Bricks and Minifigures

Are you tired of your home looking all bland and boring? Well, fret no more because I have the perfect solution for you – Lego-like decorations! Yes, you heard it right, we’re going to dive into the wonderful world of Lego and master the art of creating Lego bricks and minifigures to spruce up your living space.
First things first, let’s talk about Lego bricks. These little blocks of joy are the building blocks (pun intended) of Lego-like decorations. Now, I know what you’re thinking – where the heck do I even start? Don’t worry, my friend, I’ve got your back.
The easiest way to create Lego bricks is by using foam blocks or wooden cubes. Simply paint them in vibrant primary colors like red, yellow, blue, and green, and voila! You’ve got yourself a stack of Lego bricks ready to be displayed. Oh, but don’t forget the iconic little bumps on top! Grab some small adhesive foam circles and stick them on each brick. Trust me, these bumps are what will make your Lego-like decorations truly authentic.
Now, let’s move on to minifigures. These pint-sized plastic people are the heart and soul of any Lego creation. To make your own, you can start by sculpting them out of air-dry clay or even play-doh if you’re feeling adventurous. Give them little Lego-like faces and paint on their clothes using bright and bold colors. Oh, and don’t forget to add those tiny plastic hairs or plasticine hats to complete their look.
But if you’re not quite ready to delve into the world of sculpting, fear not! There’s another way to create Lego-like minifigures – stickers! Yes, my friend, you can simply find some miniature stickers with Lego faces and outfits, and just stick them onto small wooden peg dolls. Easy peasy, lemon squeezy!
Now that you’ve mastered the art of creating Lego bricks and minifigures, it’s time to put your newfound skills to use and decorate your living space. Stack those colorful Lego bricks on shelves, create whimsical Lego-like lamps, or even design a Lego-themed gallery wall with framed minifigures. The possibilities are truly endless!
And if you’re feeling extra adventurous, you can even host a Lego-themed party and invite all your friends to marvel at your Lego-like decorations. Have a Lego-building competition, serve Lego-inspired snacks, and dance the night away surrounded by your fabulous Lego creations. I guarantee it will be a night to remember!
So there you have it, my fellow jokesters and Lego enthusiasts. With these techniques for creating Lego bricks and minifigures, you’ll be able to transform your home into a colorful and whimsical wonderland. Get ready to impress your guests and watch as they exclaim, ‘Everything is awesome!’
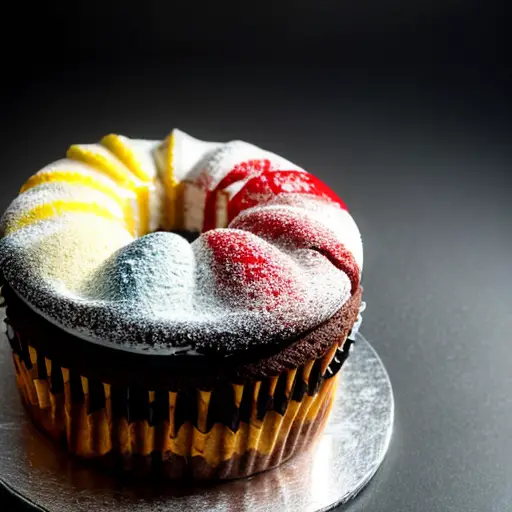
The Final Touches – Icing
A fun fact about how to make a LEGO birthday cake is that you can get creative with different LEGO bricks and pieces to make the cake look extra fun and realistic. You can use actual LEGO pieces to decorate the cake, such as adding LEGO mini-figures or building a LEGO tower on top.
Ah, the sweet, creamy goodness that is the icing on the cake – quite literally! The final touches of a baked masterpiece, the icing has the power to elevate any dessert from ordinary to extraordinary. It’s like the magical makeover that turns a plain Jane into a glamorous diva. With a flick of the wrist and a swirl of the spatula, the icing drapes itself over the cake, transforming it into a work of art. It’s the perfect blend of sweetness and smoothness, like a ballet dancer pirouetting on your taste buds. And let’s not forget the endless possibilities – chocolate, vanilla, cream cheese, buttercream, the choices are as tantalizing as a chocolate fountain at a dessert buffet. So, next time you bake, remember, the final touches – the icing on the cake – are the crowning glory that will leave your taste buds begging for an encore.

Austin is a witty and vivacious blogger who has a knack for making people laugh. With her infectious sense of humor, she effortlessly brings joy to her readers through her blog posts. But Austin's talents don't stop there - she is also a passionate cook and baker. Her kitchen is her sanctuary, where she experiments with flavors, creates mouthwatering dishes, and bakes delectable treats that leave everyone craving for more.